For us mere mortals, taking pictures of Saturn’s rings is something that is a little distant, when we hear astrophotography, we imagine these astonishing images of nebulae of thousands of colors, imagine solar explosions or craters on the dark side of the moon. And yes, these images would fall into that category, but to get them, we have to have pockets full of money and be willing to spend it to get them, or have the chance of being sent to the International Space Station?
Then you will say that why keep reading, what is the meaning of something photographic that I already reject in advance. Well, you will not be able to photograph nebulae or Neptune rings (without additional investment beforehand) but if I tell you that you can get incredible images of the sky without investing too much, you are more animated, right? How do we see? Can we see that?
Before you begin, you should be clear about the following concepts
Aperture of the diaphragm: regulates the light entry into the lens and the depth of field, as normally we will have low light, the safest thing is that we will have to work with large apertures to be able to capture it (low values of f)
Speed: This is the time that the camera shutter is open. The more open it remains, the more light it will have.
ISO: Another aspect to consider is the sensitivity of the sensor to light, which is determined by ISO, more ISO, more sensitivity (ideal for low light situations) but at the same time a loss of sharpness, on the contrary, the lower the sensitivity, the higher the image quality.
Bulb: This is one of the modes of your camera, it is usually marked with the letter B, and allows you to have the shutter open indefinitely, beyond the maximum allowed by your camera. With this system, the flap is opened and closed manually by pressing the shutter.
Although it seems to you that with what you have you can not do great tricks, the truth is that with patience, imagination and perseverance you can make fantastic images, even without telephoto, even if the subject encourages you, without one you. will it end with desire?
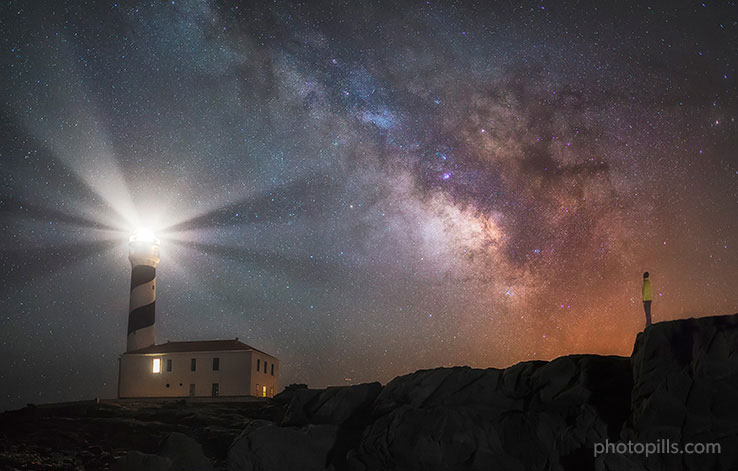
While photographing stars at such a distance may not seem worth it, the truth is that fantastic images can be obtained through, for example, Earth’s rotational motion.
Since the stars of the night sky are not usually very bright for our camera, to be able to photograph them we work with prolonged exposures (our shutter stays open for a few seconds to be able to capture enough light).
There are two ways to photograph the stars for the mere mortal: with the static camera on a tripod and with the camera placed on a camera that mimics the movement of the earth to get rid of, leaving the stars visually static (on top of a telescope that mimics the rotational motion of earth or another system). Chances are you’ll only use one tripod, at least at first.
In general, here are the recommendations for photographing the stars
If darkness is not your thing, the King of Stars can also be a great photographic opportunity, because alone or accompanying a beautiful landscape, can be a great protagonist of the image. Ideally, if you want to bring the sun close enough, it is to have a telephoto lens of about 200 mm. or, of course, a telescope. If you don’t have any, don’t worry, you can get wonderful images playing with the sun and the environment, especially when you approach the horizon where it looks bigger.
Another great astronomical classic?. In this case, you will face the darkness, in fact, the darker the better, the more contrast there will be and the more the moon will stand out.
For all star lovers, the next logical step is to get hold of a telescope and fix the camera, one way or another. There are several techniques that can be infinitely complicated.
Parallel photography: it is based on fixing the camera at the top of the telescope using the camera’s own optics. If you have a motorized equatorial mount, the camera will correctly follow the apparent motion of the stars and neutralize it.
Primary focus photography: In this case, thanks to an adapter, we attach the body of our optics to the telescope, taking advantage of its higher resolution.
Projection Photography: Similar to the previous one but adds a separator that emphasizes magnification, allowing you to zoom in even closer to celestial objects.
Getting images of the night sky with all its elements can be as rewarding as it is frustrating, as there are many aspects to consider and it is not easy to expose or compose in these lighting conditions, however, you will see that the penalties disappear when you get a good photo. In life, no one gives you anything, let alone photography !?So now you know, you practice, you correct, you progress and you’re getting better every day.
You dare try it? Surely if so far you haven’t cared too much about these kinds of photographs, is it because you haven’t thought about the amazing results you can get?Oh, if you found it interesting, share it so that someone else can benefit from the information Thank you and soon?