Another interesting factor is that most photographers don’t know how to properly use a monopod, or have frequently asked questions that are not answered, so we decided to share some tips.
When you buy a monopod, you’re looking for about the same things you’ll find on a tripod, stability and height. It is better to get the minimum number of sections for the desired height, each additional setting will be a source. instability.
- As with tripods.
- The best carbon fiber monopod.
- Which combines great rigidity with remarkable lightness.
- Of course.
- You can use a headless monopié.
- But this makes some shots very difficult.
- Especially if you’re shooting from extreme angles.
Discover in this article the definitions of monopod, its use, the correct way to insert it into your photography successfully, the tricks to promote greater stability of your equipment, its use with heavier lenses and cameras and, in the end, how to make the relationship between the monopods and the work kneecap and even more.
Monopods, often called monopods or monopods, are rigid objects to which the camera will attach to provide greater stability and ultimately to avoid blurry photos. This was the main mission for the design of the Monopé, although they were also widely used for countless other purposes. Today, however, the trend is to use it in the form of selfie stick to use with cell phone cameras.
Depending on its different models, a monopod with a wide price range is offered, from the simplest version to the most complex version with special heads, controls and feet, some of them weigh no more than 6 grams, especially the models known for selfie sticks. while others can exceed 3 kilos, given the quality of the material and accessories.
In addition to preventing motion blur in still images and preventing the movement of the digital video camera, the monopié has several other practical uses as well as creative applications. Sports photographers, for example, use the monopod to support the weight of super-long telephoto objes. , they also like the fast and precise portability offered by this equipment to move from one place to another in search of the best angle.
Animal photographers use the monopod for very similar reasons, but note that it can be photographed more easily through landscapes, due to its low weight compared to a traditional tripod.
Street photography professionals often add the use of a monopié, such as a cane and camera, to obtain more consistent photographs. As for traveling photographers, they like to use the monopié to obtain high perspectives and unique angles, using the superior extension features of this photograph. tool to steer your camera completely up or down.
Video enthusiasts can use it to scroll or go smoothly. They also use monopié as more affordable steadicam devices. The monopié is a valuable and affordable accessory for a DSLR camera that can help the photographer create above-average images and videos.
When preparing these tips, we come across a wealth of information that can help you get the most out of your monopié for your photos. Some photographers are somewhat inconsistent about using a monopié in their professional photography life. Here are some tips that will make you improve your ability to make the most of it and get sharper images than ever before.
The two most common uses of monopods are sports and animal photography, styles known for photographing fast-moving people and animals, and the main photography modes affected by blurs in your photos. You can also learn some simple tips on how to properly use the monopié and eliminate this problem once and for all.
Create a second point of contact
Using your monopié with your leg pointing down, in a perfectly vertical position, between your feet is certainly the best method to use it, however, only a point of stability in contact with the ground is not the most stable way to use a monopié. you would be surprised at the vulnerability offered by this setting for your images.
Without a doubt, this is the kind of thing that most photographers do and provides a lot of satisfactory results. You can get additional sharpness and perhaps allow for slower shutter speeds when you add a second point of contact with the ground.
There are several ways to add this second stability point that will reduce camera movements and greatly improve your photography. We’ll get to know some of them in order.
The first is to add a second physical connection to a stationary object on either side of your monopod, it can be a tree, a pole, a chair or any other solid element that can perform this function, some photographers even use the plastron of a balcony or rocks, it all depends on the desired result.
You’ll also get the same effect by placing your camera, arm, or maybe the skateboard leg so that it touches a fixed object to reduce forward and backward movements, sides, or even both. A clear example of this technique is to use your foot as a stand for the monopod, providing support for leg equipment.
Choosing the best fit to use the foot as the second support point of the monopié will depend on your method of capturing the photos. In other words, if you are pulling with your right hand, place your left foot forward. Then touch your leg directly on the inside of your right foot. Therefore, your monopié must rest firmly against the inside of your right leg to create that second point of contact that we mentioned earlier.
These two techniques for using a monopié can allow you to use slower speeds while getting sharp images. They are not as stable as using a camera tripod, but much better than most amateur photographers when using a monopod in their photographs.
The third trick to better use a monopod is to think of both the legs and the monopié, specifically how they can work together like a tripod, in this case, the lower leg is placed on the ground two feet in front of you. . His two feet are far apart and he leans forward, which puts some downward pressure on his equipment. This sudden force will improve the stability of your equipment.
Just be careful, make sure that the clamping legs of the equipment are safe and in good working order so as not to cause an accident with your equipment or with yourself in this technique.
There is another perspective with the technique we talked about earlier, known as the “human tripod”, where the photographer uses his own legs with the monopié to create an effect similar to a traditional tripod. This new perspective adds a kneecap to the team.
With this small accessory on your skateboard, the camera can be placed completely upwards, an excellent view if you are photographing a bird in a tree, for example, in this case, the photographer could lie down and add less weight on the monopié.
Using a monopod with a ball joint will allow you to adjust the angle of your camera to shoot something there, at eye level or upwards, depending on your needs. This setting can be used in almost all styles of photography, but with a special tint for animals. photography and weddings.
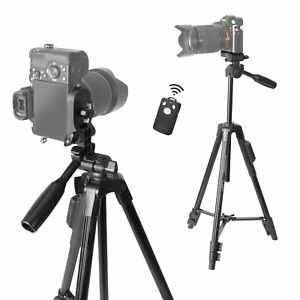
You can also use this photo equipment to increase the height of your camera and get a bird’s eye view with your bird photos, for example. An automatic timer is also an option, but it loses the ability to time your photo very accurately. However, try connecting a shutter remote to your camera and taking a photo with the camera mounted on the monopié.
Have you ever wondered why sports photographers use a monopod when they can capture with extremely fast shutter speed to freeze the action?This is certainly not to prevent motion blur.
It is also a great tool to simply lighten the weight of the arms and reduce muscle fatigue during the photo shoot. Sports photographers, in particular, wear heavy lenses, which can be a big challenge for muscles in a long series of photos.
Likely, these photographic equipment is very expensive and no professional photographer wants to risk any kind of accident with them, so most of them use the lens mount ring, a safe way to attach the lens to your monopod in the most stable way. Possible.
Most long telephoto objers already have a lens mounting ring that is the center equilibrium point when connected to a DSLR camera. These rings have a button on the collar that can loosen enough to allow the camera to rotate without having to use a tripod head on your computer.
While the use of a monopod has several advantages, you should also consider some drawbacks before including this equipment in your professional photography kit: the main drawback of portability is that it limits your mobility, although it does not limit your movements as much as a tripod, a monopod will continue to block your movements, you must take it with you at all times and adjust it between shots.
The assistance offered by a monopod is also limited. This equipment really won’t help you stabilize and focus at higher speeds, because you just don’t need help in these situations. When the camera shutter opens and closes at a very fast speed (e. g. 1/500th of a second), your camera will not record small movements. In fact, as long as you follow the reciprocity rule, you shouldn’t need stabilization to improve the sharpness of your photos.
A monopié also can’t save you when you want to use a very slow shutter speed, as the movements of light blur your photos. Since the shutter speed is less than about 1 second, the monopié will certainly not back up the image.
This question is the most common of all the monopod questions I know, countless photographers, amateurs or professionals, wonder if it is worth buying a monopod, it is important to agree that a large number of professionals take advantage of this equipment during their photo shoot, and that they provide support and stabilization while you are photographing. On the other hand, a monopod limits your movements and does not offer at any time the same advantages as a tripod.
So, should you buy a monopod? The short answer is yes, if you intend to capture images of wild animals, sports or even everyday images where you need to move faster, otherwise I don’t think the monopié will be useful to you. With these pros and cons that as we have seen throughout this article, it is possible to conclude that these are photographic and filming equipment that can sometimes be useful.
However, if you have trouble holding the camera or holding it firmly, try a monopod, but if not, no. You probably don’t want to take with you equipment that’ll only come in handy a few times, do you?
In short, buy for the photography styles mentioned above, otherwise this decision is at your own risk. Some photographers say it’s better to have, there’s a bit of truth in it, after all, it’s better to sin too much than for lack. . However, will it depend on your budget, discover some amateur and professional models in our online store eMania?Photo and video on http://www. emania. com. br/
The bottom line is that whenever possible you can use another part of your body to lock the monopod in order to increase stability. Try each method and see the one that best suits your photography and style needs. Regarding the type of head to use. use, where appropriate, will be a personal choice and depending on what you need.
Also use this equipment to enhance the security of your work tools and get totally different angles and perspectives, as always, imagination will be the fundamental ingredient to get great photos with the use of a monopié.
We cannot fail to emphasize again the difference in weight and size of a monopod compared to a traditional tripod, this choice is deadly for professional photographers who need to move frequently and, to do so, they need more mobile equipment.
Finally, since we all learn from each other, we’d love for you to share with us how you use your monopod in the comments section below.