We’ve already talked here on the eMania blog about a photography technique used in Hollywood movies (see the Bullet Time article here), and our topic for today will be no different. Although Time Lapse is not for the exclusive use of cinemas, it is much more common in this type of project.
I think you have seen those hectic images of the movement of people on a busy street, or even the construction of a building or a gym. In this article, you will understand what it is, how it works, and how to edit time-lapse photos in the best possible way.
- Like everything in the world we’re not used to.
- We need to know Time Lapse in detail to work with it the right way.
- The method to do this effectively is to know what Time Lapse is.
- So let’s go.
Basically, time-lapse photography is the capture of multiple photos of the same event, spread over a period of time and then sequentially placed into a video clip, which can be played back in seconds.
This definition, a little too technical, may not be enough to present this kind of amazing photography. Let’s take a clear example so you can more easily understand how it works.
How long is the sunset? I know this sounds like a strange question, but most of the time, if you want to see this natural spectacle, you will have to wait, on average, up to four hours to see the full event. With Time Lapse, it is possible to accelerate all this, without losing the magic and emotion of the event.
Now let’s look at the simple steps to learn how to assemble time-lapse photos, they seem simple, however, you will need balconies and a lot of attention on each of them to make everything work out.
There are a number of things that can turn into good photos in Time Lapse and trust me, choosing your subject can be more difficult than you think. Likewise, it seems like most things have already been created by other people, so it can be a big problem. challenge to be original with your project.
On the other hand, don’t underestimate your creativity and intelligence. I’m sure you can find an amazing and best of all super interesting and motivating theme to create your Time Lapse.
However, if you are having trouble completing this important step in your project, here are some tips: fruit rot, ice melt, grass growth, sunrise and sunset (very common), movement of a major street in your city, a mother’s pregnancy and the growth of her uterus, a civil construction, the movement of the stars, her self-portrait through the years, the life cycle of a tree, etc.
As you can see, you have a wide variety of themes for you to choose from to create your Time Lapse. But, it is important to remember that each of them will need a different commitment, that is, filming the sunset, which usually takes a few hours, will require less effort and time. that civil construction, which can take months or years. for the completion of the work.
Depending on your theme, established in the previous stage, you will want to know how long it will last or how long you are willing to invest in it. In the same way, you will need to set the duration of your final Time Lapse Video. Remember that the idea is to present long events in a short time, it is the magic of Time Lapse.
In this step, you will learn how to better define these time ranges to get the best result.
Usually the duration of the event changes the way you take photos to set the Time Lapse. A short-term project, such as pregnancy, can be achieved through daily photos of the pregnant woman. For a longer event with rapid changes, a building, for example, will need more photos and in less time. For events with little but long changes, however, the interval between photos can be much longer.
There’s not much to say here, you have to wonder how much time you can spend on these photos while documenting the action of the event. In some cases, an intervalometer may be needed to automate the recording of photos from time to time.
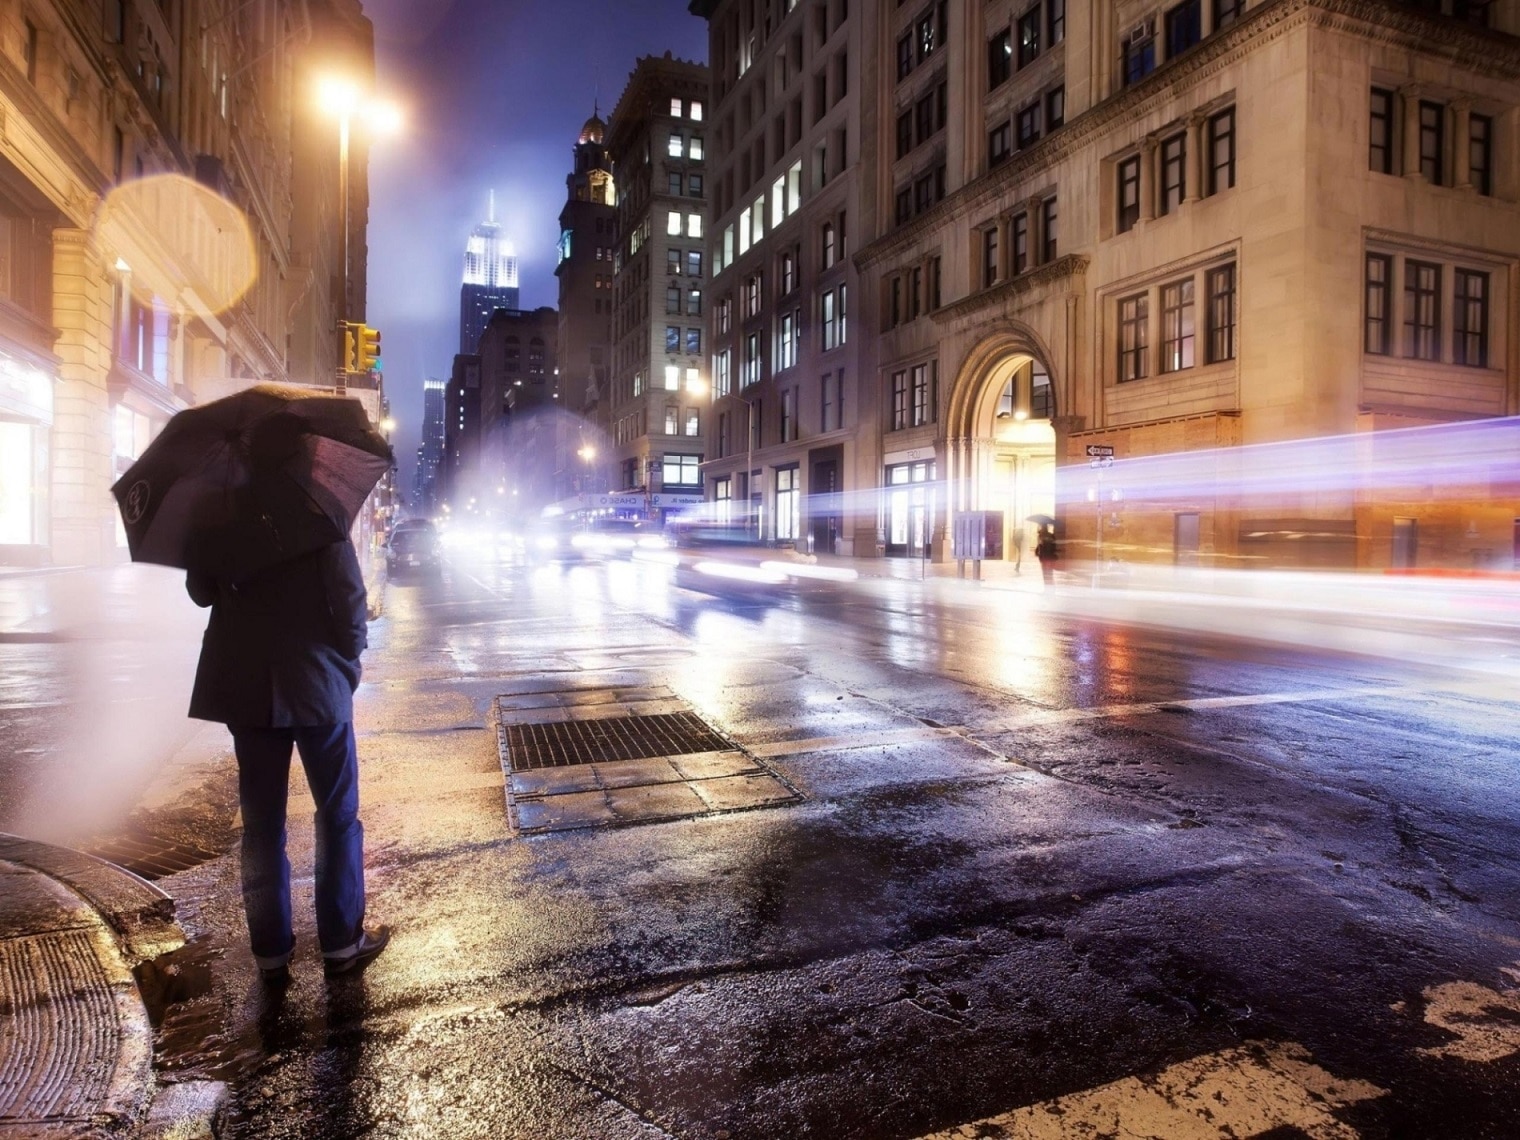
Your time span can end in two ways: massive or smooth and seamless. With blocks, the photos seem to change abruptly from one scene to another. In a span of time on a busy street, for example, one person may appear on one side of the street in a photo and the next person on the other side. The downside is that it can remove the natural from the scene, and you don’t want it!
Another thing that can happen is the shutter speed, and here is the basic rule of photography. Capturing too quickly can confuse objects, making it difficult for the viewer to follow what’s happening in the scene. In a slower capture, objects will be sharper and their movements lighter.
The best alternative will always depend on what you are photographing and the expected result with these photos. While high speed can disrupt the movement of people and cars on a street, it can be a great way to describe routine in a large building, as changes happen more. frequently and faster.
Mathematics is present in everything we do, but if you don’t like it or don’t have privacy, don’t worry, I’ll keep it as simple as possible. First, you should remember that most movies are between 20 and 30 frames per second. In other words, that means 20-30 photos per second to join your final photo.
Who cares? The more frames the DSLR camera has, the better the quality of your photo. In addition, this will be important for the little magic formula that makes any Time Lapse a real success.
For this account, in addition to knowing the number of frames per second of the camera, you need to know how long your Time Lapse will last, the video clip with your photos, this factor will depend on the event you intend to photograph. However, it is easy to get as it is you who decides the length of this video.
To illustrate this, let’s say you plan to record the sunset, as this event takes about 4 hours to complete. Well, for the final video we intend to show it in just 30 seconds and our camera has 24 fps. Then the account will look like this:
24 (fps) X 30 (seconds) = 720 photos
Result: You will need 720 photos to fully represent the sunset.
Now let’s find out the time interval between each of the 720 photos. Given the same data that I mentioned above and using a quick calculation, we have:
14,400 seconds (4 hrs x 60 s) divided by 720 photos – 20 seconds (interval between photos)
Ready! You already have the calculation, let’s take the next step
Really, the equipment you are going to use to take photos for your Time Lapse does not matter as long as you know how to make it work properly. Some people use SLRs, compact cameras, or even webcams.
However, some equipment is recommended to improve its performance, including a tripod. Unless you have great stamina and don’t mind standing for a long time, a tripod can help keep your footage stable and free to do other things. If you don’t have a tripod, place your camera between books or create a custom stand.
If you have an SLR, you can buy an intervalometer, also called a remote control or timer, with which you can program the camera to take pictures at predetermined times and intervals, such as a photo every 5 seconds, or every minute, etc.
In eMania? Photo and video you can find this equipment at different prices, on our website www. emania. com. br. The advantage is that it leaves you free and maintains the quality of your time lapse.
Set your camera to save in JPG format, to save space, save time and memory cards.
Set the camera’s white balance to Manual, the automatic can change and vary a lot, especially if you take photos at times with different brightness, leaving it in the manual will ensure a similar look in all images, which is amazing for your Time Lapse .
Also, the exposure of your camera should be in manual format and the justifications are the same, to get photos as similar as possible. The idea is that the camera settings change as little as possible while capturing photos for your Time Lapse.
Now, do you remember how you want your last time lapse, in blocks or without problems?If you want a smooth and perfect look between photos, adjust the camera exposure as long as possible. When you force the camera shutter to stay open longer, moving objects, such as cars and people, will appear more clearly (remember when we talked about speed there?)
However, it’s not all flowers, the side effect of long exposure is the excessive impact of light on the camera sensor. To avoid overly bright images, we suggest purchasing a lens filter to help control light exposure.
Some cameras, like the new Nikon ranges, already have the timer built into the menu, others even have automatic time lapse. However, if you decide to use a slightly older camera, you will need additional equipment to do so.
If the event to be photographed does not require many photos and is not achieved in a short period of time, you can capture these photos manually without any problem. But, if this isn’t the case, you can rely on firmware piracy or even mobile apps that can integrate your smartphone with your camera that offer this functionality.
Some mobile apps also do the calculations for you, as we saw in step 2, all you have to do is enter the data into the app interface and wait for the result. Here we separate some google results so you can see some of the time. Lapse application options, click here.
Surprisingly, using a webcam on your computer can also take an incredible amount of time, thanks to some programs available on the market.
For Mac, there is an incredibly cool program called Gawker. Instantly recognizes the webcam connected to your computer, or better yet, any available computer on your local network. After specifying an interval for you to take new photos, a button will appear to start capturing your time lapse.
The good thing is that with Gawker, you can also combine views from multiple cameras into one video clip and you can even use your computer to store your photos and Time Lapse.
For Windows devices, we introduce the Timershot Webcam program, which is part of the free Microsoft PowerToys software suite, does the same as Gawker, but does not have the ability to split the screen or save your desktop. To make it work, specify an interval and the Timershot webcam will take pictures from your webcam and record them on your computer, in a folder of your choice.
With the necessary equipment, ideal camera setup, applications, and software ready, you may think your Time Lapse should begin. Before starting your adventure, we have a few last minute things:
Ufa. After all this, you can believe that the hard part is over, right? Not really! All that remains is to download the photos to the computer, edit them if you want, and with some software, edit them into a movie.
However, if you are not very familiar with photo editing software, this can be a problem. But I have good news, although you have many photos to build your Time Lapse and need some adjustments, you don’t need to make this correction one by one.
In Photoshop, the most common photo editing software, you can program an automatic action to edit a batch of images at a time. All you have to do is choose the settings for a main photo, like saturation and exposure, burn like Photoshop. and then select the folder where the photos should be changed, the settings will be made, and the new images will be recorded in a new folder. You already have all your Time Lapse photos edited and ready to be used.
We have the best part, how to mount photos on a Time Lapse. It sounds complicated at first but you’ll see that everything is simpler than you think.
After downloading your photos to your computer and saving them to a folder somewhere, we have found the fastest and easiest way to edit them in a span of time. Use Apple QuickTime Pro, available for MAC and Windows.
In the QuickTime file window, select “Open Image Sequence”, then browse to the folder containing your photos and choose the first one. Double-click, then QuickTime will ask you how many frames per second you want your movie to have. will do everything else for you.
From there, you can export it to the web or save it so you can add titles, music and other effects to it in a movie editing program.
We have found QuickTime Pro to be the best and easiest for this, but you can get almost the same in other video editing programs as well.
To use iMovie, for example, import all your photos into iPhoto. Start a new project in iMovie, find your photos in the Media window, select them all (by clicking and dragging the mouse or selecting the first photo and holding the Shift key and clicking the last photo in the list), and then Open Photography Settings.
Set the duration of each photo to a small number, like “0:03”, do this for 3 photos, then click Apply to all. The photos will be added to your movie timeline and a beautiful Time Lapse video will begin.
If you’re using any other application besides iMovie or Quicktime Pro, the process is likely the same, whether it’s opening a sequence of images or manually adding your photos in order and adjusting their duration.
Once you have a Time Lapse video file, import it into a standard video editor, such as iMovie, Windows Movie Maker, or Adobe Premiere, and start adding details to your video to make it more enjoyable.
Add music and titles, and you’re ready to show off your latest movie! You can also try some effects, such as panning and zooming in your Time Lapse movie, to add movement and improve the end result.
Creativity is everything! You can print a flip book with your photos at intervals. The FlipClips. com website allows you to download short videos, then print them as books and send them to your email address. Perfect for any Time Lapse project.
You can also do a Time Lapse with iStopMotion, another Mac program. While this is primarily for creating stop motion movies, it has a very good time lapse, allowing you to use a camera or webcam, a digital camcorder, or even a series of normal digital cameras. Check out!
Well, now that you know the secrets of interval photography, have fun!Don’t forget to share your results with us in the comments field below.