Last week I was telling you things to keep in mind when you go out to take autumn photos, today I reveal the settings and manual settings that I recommend (and that I use personally) to take a correct fall photo.Today’s article shows once again how simple manual mode is, however difficult it may seem, once you use these settings and start experimenting with them, you won’t want to know anything about automatic mode.
I can’t give you the exact settings because they’re going to vary by scene, time of day, amount of light, whether there’s sun or clouds.You have to test (and learn). Yes, I can suggest the settings you would use as a starting point to take this first or second test photo, from which you would change these settings one way or another.
- Autumn is a light season.
- Or at least less intense than summer.
- For example.
- If we add to that the ideal time when we take an autumn photo.
- Which would be in the early morning or late afternoon.
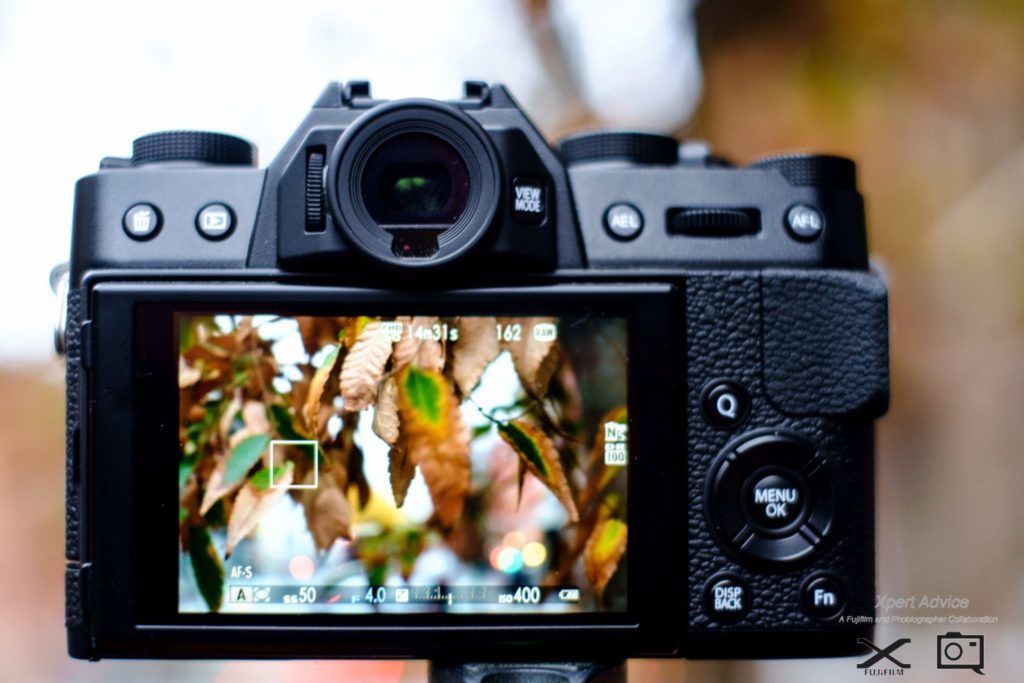
- We are presented with a situation that requires adjustments similar to the following.
In this example, as in real life, I use manual mode in the camera mode selector, which is marked “M”.This allows me total flexibility to decide how I want to configure each of the three main parameters that affect light.
Do I photograph a landscape/general scene?Do I want all the elements of the frame to be well focused?If yes, here are the parameters from which you would personally start:
This allows me to reach a great depth of field, i.e. a level of sharpness and homogeneous focus for all the elements of the frame: background, trees, leaves on the ground, river, mountains, everything will appear correctly focused.
Be careful, an opening like f/11 will darken the photo. The higher the f/ value, the more underexposed (dark), I’ll compensate you with the shutter speed and the following ISO settings that we’ll see below.
Starting from this shooting speed to compensate for the low light captured by the camera as a result of the previous point, remember that the slower the shutter speed, the more light we get, so I start shooting at 1/20.Is the photo too underexposed? Slow down a little bit, type 1/10, for example, and I will.
Careful, the lower the shutter speed, the more “blurry” the photo will be, because the camera will capture the movements of my hand holding it and taking the photo.This, the only way to mitigate it is by using a good tripod (a good, really, with enough stability to withstand the characteristic autumn wind, here are some recommendations).
A remote trigger wouldn’t hurt either
If I don’t have a tripod, I want to prevent the photo from moving (tremor) and I have a photo underexposed, I have a solution: I will increase the shutter speed, even beyond 1/20.You can try 1/30; 1/60; 1/200 if necessary. At such high speeds, would the photo look too dark?It’s all right, it’s gone by ISO.
By default, my SLR camera is set to ISO 100, this is the value I usually work with by default and it is also the setting I touch the least.I’m not playing unless it’s absolutely essential to me, as in this case.
Suppose I take the first photo with ISO 100, aperture and shutter speed as I mentioned above, now let’s say the photo is underexposed.Suppose I can’t slow down the shutter because in this case the photo would be blurry.
Increase the ISO beyond 100.I will test with ISO 200, ISO 400, etc.until it gets to the point where the photo is sufficiently exposed.Remember that the higher the ISO, the more light the camera will capture but also the more noise (grains) shown in the photo, then it is about finding balance, for a bad one I always prefer to have a photo well exposed but with noise, to a clean photo of noise but totally underexposed.
If what I’m looking for is to represent autumn through some of its characteristic elements: a fig tree or a seasonal fruit, a chestnut tree, or if I want to photograph a portrait of a person in an autumn setting, here are the parameters you would use:
Me refiero a que utilizaría la apertura más amplia (valor f/ más reducido) posible que el objetivo me permitiera. En mi caso dispongo de un objetivo 50mm f/1.4 (al que llamo el Rey de los Objetivos) y éste sí que me permite alcanzar esa apertura. Otros objetivos menos generosos en luz te ofrecerán una apertura f/4 ó f/3.5 como valor mínimo posible. No pasa nada, utilízala. El tema es utilizar un valor f/ lo más reducido posible. ¿Por qué? Con esto la cámara es capaz de captar ingentes cantidades de luz, por lo que de paso ya nos libramos de tener que compensar la falta de luz con el resto de ajustes.
In addition, with an aperture of f/1.4 or similar, we may even have to reduce the light by playing with shutter speed or using another factor.
A large aperture (f/small value) also allows you to isolate the subject or object, give it a very precise and sharp focus, and leave the whole background completely blurry, giving the subject its full visibility.
As I said in the opening section, using an f/so low value allows the camera to suddenly capture large amounts of light.Then I need a relatively “fast” shutter speed to compensate for this excess light and ensure a certain balance.It will depend on whether it’s a sunny day, or if it’s in the afternoon, and many factors that interfere with the settings, but that 1/500 entry seems like a good starting point.
Por cierto, ¿has visto el vídeo en el que explico de forma muy clara cómo funciona la velocidad de obturación en fotografía?
In this situation, it is almost certain that I will not have to use ISO.The only thing I would like would be to capture more light, which I already have by using a large aperture (f/ 1.4), so I have ISO, it remains at 100.
As you can see, manual mode opens up a whole world of creative possibilities that you can capture with your camera.The only way to harness the creative potential of autumn is by using manual mode.I’ve shown you two examples, but they’re just a starting point.Practice them if you can, but above all experiment and explore different parameters.You may be pleasantly surprised by your own results.
Thanks for reading so far. I hope the article has helped you, if so don’t stop posting it on Facebook, Twitter and Google, will that make me happy?