We believe that when it comes to shutter speed, people generally prefer “Fast”. In fact, it seems more common to freeze the action, stop the movement and capture the moment. And to do this, we set shutter speeds in the order of 1/500, 1/1000 and 1/2000 seconds, but there is another side of the exposure. Call it the “not so fast” side; or, more precisely, the “a little slow” side.
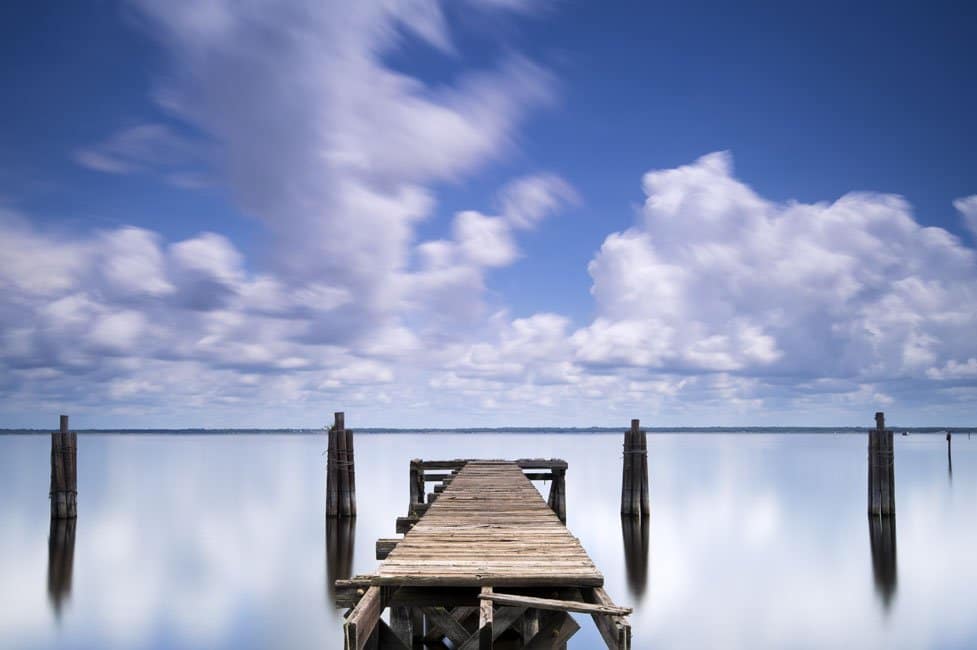
Reduce your shutter speed, really slow it down, and you’ll be able to capture no less than the cumulative effect of the passage of time. You will see the result of the clouds moving in the sky; the softness of the supposedly static water; and, more commonly, the visible entanglement of headlights and taillights of cars traveling on the city’s roads and roads.
- The great appeal of prolonged exhibitions to photographer Deborah Sandidge is the creation of expressive.
- Often surreal.
- Considerably different images from the usual ones.
- “Prolonged exposures are particularly effective for travel photography.
- ” he says?images when they travel.
- But with prolonged exposures.
- You’ll look very different.
Long exposure photography is a contemplative effort focused on more specific topics and requires specific equipment and techniques.
The first requirement is a tripod. Yes, we know that a tripod on a trip sounds like a nuisance, but it’s absolutely essential. Deb’s choice for photos is a lightweight model (just over a kilo), which folds up to 40cm in Then, neutral density (ND) lens filters will be needed. As expected, a lot of light will reach your camera sensor during prolonged exposures, some of which can last a minute or more, and the results will be overexposed and even f/stops of f/22 yf/32 do not cut enough light, but neutral density (ND) filters do.
There are three types of ND filters available: Fixed: measured by density targets; Variable: which are filters that change to increase or decrease the amount of density; Graduated: also called split neutral density filters, where the amount of density varies by about half of the filter, the other half is clean.
Deb brings the three boys with him and sometimes mixes and matches according to the scene and how he wants to express it. The advantage of the variable neutral density filter? he said, “is that I can adjust it a little bit to get a lot of density with a filter and not have to combine several in the camera lens. And if I’m not sure how much density I need, the variable ND filter is a convenient way to experiment, especially in a situation where light changes or ocean waves move.
To correctly use fixed density filters, you must first decide how much neutral density you want. Fixed filters are classified according to the amount of light blocked: an ND2 filter will block a light shutdown; an ND4, two stops; an ND8, three stops; Etc. ND filters can also overlap, so it is possible to combine the force of neutral density. To know which ND filter to use in a given situation, you essentially need experimentation and experience; in other words, trial and error. Deb discovered that it took him a short time to experiment until he was able to define a situation for an ND4 or ND10 scenario.
Then discover the scope of the exhibition, and it’s quite easy. I use a phone app called ND Timer, he said?Deb. ” The first thing I do is prepare for an accurate exhibition of the scene, defining a chosen aperture, which is usually f/11, f/16 of/22, because I almost always want a great depth of field. I change the shutter speed at any speed that gives me the right exposure for this f/stop. Then, insert the shutter speed and force of the filter or ND filters chosen in the application, based on your experience. If you use layered filters, such as an ND10 and an ND4, insert 14, the combined total of neutral density. “The app then calculates the extent of the exposure in seconds, counts the exposure and makes a sound to let me know that time has passed.
ND filters are usually not required for photos taken at dusk or dusk. “I like to take a lot of pictures at the end of the night,” Deb said, “and then the exhibition will naturally be longer because there’s less light in the scene. “However, you can use a graduated neutral density filter to keep sky light in a twilight image, if you feel there would be too much lighting.
Typically, use the ND timer to get an overview of the scope of exposure. The trial and error experience has taught you how to add a little more time to estimate the app.
The penultimate piece of essential photographic equipment is a trigger cable to activate the shutter and lock it open for the duration of exposure. Finally, depending on the Nikon DSLR camera you are using, do not forget to slide the viewfinder cover or use During prolonged exposures, it is not desirable for diffuse light to enter the camera through the back cover. This can cause streaks in the image and even a color change. For exposures of 30 seconds or less, when using an ND filter. Unsoted, Deb will choose an aperture and use the camera’s shutter speed setting, or calculate the exposure time based on experience.
Add two more tips: “Before taking long-exposure photos on an important trip, try it out. Find out what things will be like, create preferences and opinions. Remember that the most important thing is that you are photographing as a creative expression. What do you want this scenario to look like? Finally, there are few bad decisions. You will learn from each image and experience, and when you get a result you didn’t expect or didn’t expect, the steps that lead to the result can be part of your technique and your learning.
“It’s always different, ” said Deborah
Author: Photographer Deborah Sandidge Source: Nikon Learn