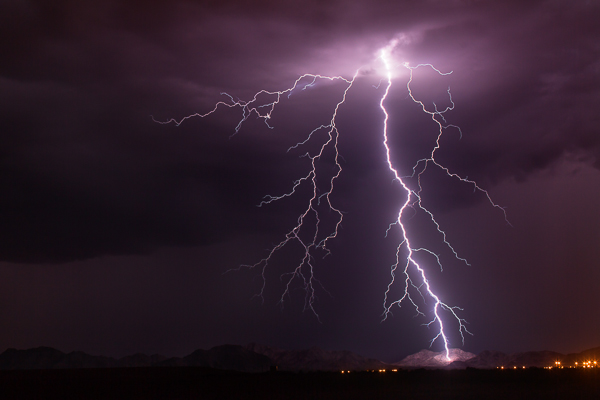
Lightning is an amazing subject to trying to photograph. Magnificent and unpredictable, it can happen at any time of the year, even in winter. There are many ways to be creative when it comes to photographing lightning. To help you, this article will bring you some important tips on how to photograph lightning and lightning.
Before you start photographing lightning and lightning, look at the pattern of falling rays, this can help you decide which photographic lens to use. Lightning can come from all directions, but if for example they fall vertically, a more appropriate lens, for example, is 24-70 mm, because if there are many clouds and rays between them or inside, a good option would be a 70-200 m lens.
- The lens you will use can vary.
- But be sure to choose the one that is suitable for the type of area you are in.
- The distance you are from where the cataracts appear.
- Or the highest concentration of radium.
The intensity of the rays is very important because they help to measure the opening of the shutter, the ISO sensitivity, defining the appropriate exposure to capture the image.
As you approach a storm, it’s important to study it just before you start photography. How often do lightning strike? Does it suit any of them?What’s the brightest, the first or the last?
DSLR photography allows you to immediately review each image on the camera’s LCD and adjust the settings until you get the photo you want, so you can base exposure measurements using the intensity of the previous rays.
Lightning can strike a variety of colors. The most common color of a ray is white, but the ray may actually appear red, yellow, green, even blue or purple. The tone usually depends on the gases, chemicals and impurities in the atmosphere, as well as the actual temperature of the ray.
Although white is the closest color to natural rays, its color can vary when there is a high concentration of dust or pollution in the air. As in large cities, industrial areas or a lot of dirt in the atmosphere. So pay attention also to the colors and where these rays fall, at the moment, depending on the place, a lens filter can be very useful and balance the nuances.
Obviously, we need a storm, and not all storms happen at night, for example, where lightning is easier to see, but if it falls at dusk, at dawn among other things, colors can give your photo new results and a new personality. .
Does seeing the camera with the least noise reduction of your sensor you can buy, does this help minimize the ”pops” caused by strong lightning light. Also get the fastest targets, with a focus engine for greater capture agility. simply indicate a suitable type of camera or lens for this, but it is recommended.
The faster the target, 1. 4, 1. 8 or 2. 8, the better for shooting under existing lighting conditions, but for shooting with lightning and lightning, the darker targets at 4. 5 or 5. 8 work well.
Even invest in a high-strength, high-quality camera tripod with solid materials and preferably stainless steel to stay in the weather. Check if your feet are adapting to the rugged terrain, whether they are rubber-coated and capacity-coated. In addition, the use of remote triggers for DSLR cameras minimizes vibration and flicker at the time of shooting and ensures more clarity in the flash image, which also makes a big difference between one photo and another.
This is invaluable for shooting lightning with a professional or advanced DSLR camera, where you can immediately check your photo on the LCD and then have several adjustment options to get the desired settings for the following rays.
When shooting rays and flashes to leave white balance, color dies and automatic 3D colors can save you time in post-correction. The shutter for BULB, the aperture for f / 5. 6 and ISO 400 can be your basis to start the photos, then the first screenshots, it is possible to make the necessary changes, if the image comes out too gust or too dark, you can decrease or increase the ISO or the shutter speed.
Always turn off autofocus. When photographing lightning, you’ll want to use manual focus. Automatic adjustment of the lens to infinity will not always give you the sharpest image.
Look for a distant light and focus on it. This will result in sharper images. If you don’t have distant light, ask a friend to walk at least 100 meters from the camera with a flashlight and then focus on the flashlight lens.
Try to fire lightning before the storm or away from the strongest rains. Humidity, especially rainfall, can soften the appearance of a flash image, even when the focus is correct.