Few things will frustrate you so much as a photographer that he starts taking his first steps in digital photography than seeing this, those spectacular photographs you just took on your computer and their sharpness on your camera’s LCD screen when you upload them to your computer. , they themselves have moved and ruined themselves.
There is a big mistake that all photographers who take their first steps, as well as many more experienced fans: do not hold the camera properly. The vast majority of sharpness errors in these photographs are not due to lens problems, but to camera handling problems. when shooting.
- If you have these kinds of problems or want to review some concepts about the importance of stability in photographs.
- This article is for you.
- You can’t miss it.
While many factors influence the sharpness and therefore the quality of your photos, if your camera is not stable when you take it, none of the others will make sense.
If you hold the camera incorrectly, the likelihood that your photos will look blurry increases considerably and is not pleasant at all, at least not if we don’t try to convey that feeling.
The posture when shooting your camera and the way you hold it will allow you to get the best results. So how do you do it correctly?
The best? The way to hold the camera is something that has generated, generated and will generate many debates around it. There are many photographers, even many professional and recognized, who use both hands to hold the camera and seek a firm posture that provides stability while others do the opposite, are more flexible and use one hand to photograph their cameras.
There is no single way or method to prevent the photos you take from moving by the vibration of your hands when you hold them, after all, only you know how you feel most comfortable photographing, even creating your own style.
Anyway, here are a series of guides and tips for you to find the desired photo stability.
Your photos will be shaky when, while your camera’s shutter is open, allowing light to reach the sensor, vibrations or movements occur that cause light reflected by objects in the scene by the sensor to be captured in different ways.
When there is a lot of light, as the shutter remains open for a very short time to get the correct measurement and exposure from your photos, the chance of a photo blurring out is much lower, but when shutter speeds should be slower (darker) scenes), the chances of a photo looking blurry multiply.
Therefore, to prevent such vibrations from damaging your photographs, it is essential that you keep the camera as fixed as possible and this is done by turning your body into a tripod.
As if you were trying to mimic how a tripod works, the key to properly holding your camera is just that, getting 3 support points (or more if possible) to minimize the chance of your camera moving out of position. vertical, horizontal or both.
How to do it with only two arms? If it’s true that you only have two arms to hold your camera, remember that if you photograph it through the viewfinder, you can use the contact between it and your eyebrows or forehead as an additional support point.
This way, while controlling the camera with your right hand and supporting its weight with your left hand, you add stability using your eyebrows or forehead as a little extra support. Take the test and you’ll see what I’m talking about.
The most important aspect to achieve stability by photographing your camera without any support other than your own body are the support points.
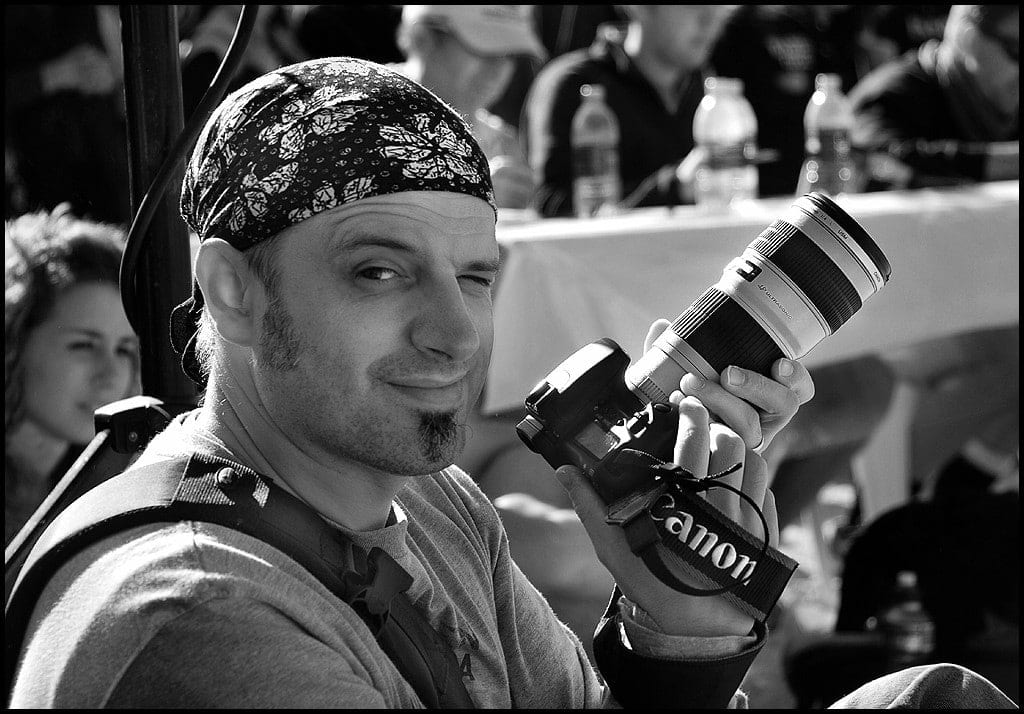
Take a look at the position of the following photographer
Would you find that position comfortable? Keep in mind that the “right” camera clamping is not only designed to minimize the possibility of vibrations that can spoil your shots but also, these postures must be comfortable so that you can work naturally in each of your photos.
In the previous photo, the only point of support that he uses with his whole body and therefore his camera are his feet, his posture is quite unstable and even forced, which increases the chances that, when working uncomfortably, the photos will not be completely clear.
At the end of reading this article, go back to this photo and try to imagine which position you would have chosen to take it.
As I just mentioned, the key to holding your camera is to make sure it is fastened as tightly as possible and this will be achieved by maximizing your support points. Now, not only should you worry about the points of direct contact with your camera (head and hands), but you also have to think about how you place your arms, legs, etc. , it is not enough to hold the camera firmly, but also your whole body must strengthen that firmness.
When you hold your camera horizontally or? Try to get your arms and elbows as close to your body as possible. The support of your camera are your hands and the support of your hands are the arms, so it is very important to make sure that your arms do not move. when shooting you hold the camera properly with your hands.
Also try to use your eyebrows or forehead as an extra point of support, pressing your camera firmly against them to get that valuable third point of support. You can even tilt your head slightly so that in addition to your forehead, you can rest your cheekbones or part of your cheeks. Finally, remember that your entire body uses your spine and legs to support, so try to stand firmly but comfortably. Keep your back straight and your legs slightly apart. If necessary, use your knees or even outdoors objects such as a wall or column to gain stability.
Finally, remember that your entire body uses your spine and legs to support, so try to stand firmly but comfortably. Keep your back straight and your legs slightly apart. If necessary, use your knees or even outdoor objects such as a wall or column to gain stability.
Previous photographs show with a green arrow the successes of the photographer in terms of holding the camera and his body posture and with a red arrow his “mistakes”. Or rather points that could be improved to gain stability.
Holding the camera upright is one of the most difficult positions to achieve good stability since your elbows, the right, no longer have contact with the body, in any case you can increase the stability in this position as follows:
Try to make the elbow that supports the weight of your camera, that is, the elbow on the left, even closer to the body, you can even try placing it almost in the middle of your chest to gain even more stability.
You can also choose to place both elbows on your body, that is, by holding your camera at the bottom with both hands, use the technique that is most comfortable for you, but always trying to maximize the support points.
In the following photo, you’ll appreciate how, despite holding the camera in the same way, even with the naked eye, you can see which of the two photographers does it in a firmer and more stable way:
This type of complication when it comes to keeping the cameras in one position or another does not usually exist when using professional cameras, because the more advanced models come with a?Grip? It allows you to hold the camera comfortably in any position (horizontal and vertical). If your camera doesn’t bring it, don’t worry, almost all models allow you to add this as an external accessory.
Right hand: The right hand is in charge of controlling all the functions of the camera, while your index finger stays close to the trigger, along with the other 3 (major, ring and ear), grab it firmly?Grip? From your camera. With your thumb, you can adjust the settings for each of your shots.
Nowadays most cameras are designed to be held in a very natural way, keep in mind that firm does not mean strong, because if you exert a lot of force, you will generate tension in the arm that will eventually generate unwanted vibrations.
Left hand: the left hand is par excellence, the one in charge of supporting the full weight of the camera, with the palm of your hand you must hold the body of the camera and with your fingers access the rings of your lens to be able to adjust them as needed Depending on the focal length of your lens, your left hand will be in one position or another , because for example, if you use very long focal lengths (telephoto lenses) try to support your weight with your entire left hand.
Fingers: The camera bodies are designed so that your fingers can not only hold them firmly, but also have convenient access to the buttons and buttons needed to configure settings for each shot.
Hands: Let your left hand hold the weight of the camera while using the right hand to perform its photographic magic by adjusting the settings of each photo.
Arms and elbows: Do you keep your arms and elbows as close to your body as possible when trying to block?elbows against his body. Remember that what gives stability to your hands are your arms and if they are not supported by your body or other objects, the chances of your photos being shaken multiply.
Eyebrows, forehead and cheeks: To take up more space, use your eyebrows to hold the camera viewfinder. If necessary, tilt your head slightly to take advantage of the extra support your cheekbones and cheeks can provide.
Back: If we talk about stability, the back plays a fundamental role, why is it the “column” of the body?Keep your back as straight as possible and avoid leaning too far.
Legs: Legs are the ultimate support point for the whole body, so you should enjoy them. Keep your legs slightly apart when shooting your camera to gain stability and avoid swaying. Use your knees as extra support if you’re sitting on the floor. that your body is your best tripod, enjoy it.
1. Look for external support: another way to gain stability and comfort when shooting is to use the floor, walls, column or other stable object that can be used as a stand when shooting your camera. Don’t miss the opportunity to gain more stability.
2. Use your muscles: if you thought that any stability when shooting depended solely and exclusively on your bones, you were wrong, it is time for you to work your muscles, do you contract your muscles a little to avoid extreme relaxation or sagging?End up subtracting stability. However, don’t get too stressed because it’s a game of firmness and not strength.
3) Hold your breath: by now you are an athlete, all you have left is that when photographing your camera you hold your breath to prevent your whole body from moving by inflating your lungs. So: inhale, shoot, then exhale again.
4. Better thighs than knees: although I recommend throughout the article the use of the knees as an additional support point, you will actually get better results if you rest your elbows on softer surfaces, it is better to rest the elbows on your thighs near the knees because you will avoid the game, it makes one bone rest on another and will be more comfortable.
There are certain situations such as night photography, if you intend to perform prolonged exposures or if you use very long focal lengths where, regardless of your efforts, you will not be able to achieve stability on your own, in such cases remember that the photographer has a very powerful ally when defeating the darkness (or trembling photos): the tripod.
When you have no choice, the tripod will be your salvation, don’t forget to take it with you if you plan to photograph in these kinds of circumstances, and if you don’t already have yours, don’t worry. You can do it yourself with materials you’re sure to throw away. How? Read the following article 😕 DIY Photography: How to assemble photo accessories for home ?.
If you have any questions about some of the most recommended positions when holding your camera to prevent your photos from moving, here is a video that, although in English, is very graphic and understandable:
If you still don’t dare make the leap to your first DSLR camera or if you feel like you don’t need it, it doesn’t matter as all the tips you just read apply to any type of camera.
The key is and always will be the stability you can get when you take your photos, no matter what camera you are using.
There are as many ways to hold a camera as photographers you have to use them, the article you just read tries to be a guide so that, using the different techniques and postures that I recommend, you minimize the risk of your photos being blurred.
Don’t hesitate to create as many poses as you think are right so your photos don’t spoil.
Just by training a little and then taking some photos, you’ll have already internalized all these poses and you’ll be able to focus on what makes it better: create great photos.
I hope this guide was helpful to you. If so, would you recommend the article on Facebook, Twitter or Google ?You may find it silly, but the number of likes is the way we know you like what we write, it’s the way other people find out about this content and come here to read it as well. It’s our fuel to work on more and more content.
Thank you for reading it as usual.