Photographers and plants have one thing in common: we both need light to live, plants to photosynthesize and allow you to capture these amazing scenes with your camera.
And for amazing photos, those made with the Lightpainting technique?are an excellent example. With a camera, lights and a little imagination, these amazing photos are obtained without any retouching. No Photoshop!
- I’m sure these kinds of photographs have caught your eye.
- You may have wondered how they did it.
- In today’s article you will learn everything you need to start painting light and dazzle everyone.
Photography of light painting (pronounced “layt Péintin”) or?Paint with light? It is one of the most curious and eye-catching types of photography today, although it is a technique that has been used for a long time, consists of drawing with light directly on the photo, lines, shapes or anything that you can think of. use air as a frame and take pictures at extremely slow shutter speeds.
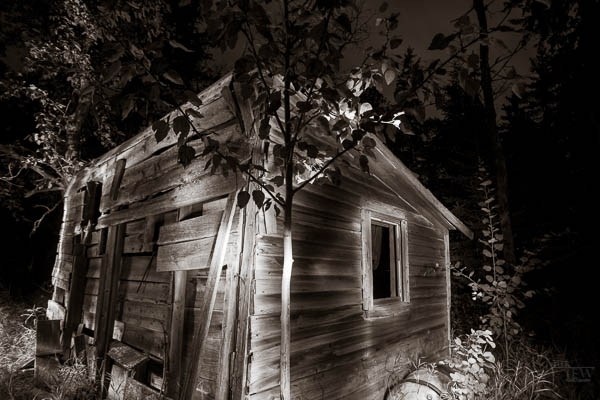
Light traces are captured by the camera sensor and “drawn” directly in the final photograph. To give you an idea of the possibilities offered by this technique, here are some amazing photos:
Many photographers already master this technique, not only professionals but also amateurs and amateurs, so if you want to see more photos of this style, just search any photo network like Flickr or 500px, to find thousands of examples.
Painting in the light is relatively simple and doesn’t require expensive equipment, let alone, it just needs a lot of practice. Once you master this technique, the possibilities become endless.
The general idea of this type of photograph is nothing more or less that, as the name suggests, paint with light directly on the stage, for this you can use lights, flashlights, flashes or anything else that you can think of, to draw the lines or illuminate the objects that you want to show in the final photo.
As you’ve seen in the sample photographs at the beginning of the article, although it’s a simple technique, it takes a bit of practice until you actually master it and since it’s a type of photography that incorporates various techniques, I recommend that, if you haven’t read them yet, check out the following articles that will help you master it from the first moment :
Later in the article, I’ll give you a step by step so you can start experimenting with yourself.
As I mentioned earlier, a very advanced camera is not necessary, with any camera with manual controls that allows you to reduce the exposure time to at least 10 seconds you can do, this is an effect that you can do perfectly using home elements. .
To achieve this technique, you will need at least
With these elements, you can already find the technique, but? If you want to boost this effect a bit more, you will also need:
These are some of the most common effects that you will find in the vast majority of light painting photographs. You can try making them yourself to practice, while developing your own.
1) Loops or banners: this effect consists, by means of a tube or a cold cathode lamp or lamp, to draw loops in front of the camera, it is important that, so that the tapes are not cut or thinned, always hold the light towards the camera.
2) Silhouettes: This effect consists of drawing silhouettes in the air with light while the camera captures the whole sequence, for this you will need a flashlight or some quite specific light source, that is, that does not emit too much light and leaves fine lines You can draw silhouettes, contour objects, people or anything else you can think of.
3) Spheres or orbs: To achieve this spectacular effect, you will need to get some extra elements such as: a rope or the handle of a paint roller without the roller, this effect is to attach the flashlight to the rope or roller to paint, so that you can always rotate in the same orbit, for this you can stick your hand to the forced and simply rotate the wrist , to make the circumference perfect and constant, when you rotate it you have to rotate it, but taking care that the axis of rotation is in the center, that is, you have to rotate yourself, but always trying to keep your hand in the same place or at the same height, to achieve a perfect circumference. videos on YouTube on how to do it, in case the explanation is confusing.
4) Rain of lights: the way to perform this effect is very similar to making the spheres I just talked about, with the difference that instead of attaching a flashlight to the rope or roller, you need to tie steel wool. Yes, you read right, those steel wool sponges you got in the kitchen. The magic begins when you set them on fire because they are very flammable and if you turn them very fast they start to throw a shower of sparks that produce a spectacular effect. (Don’t do this at home, don’t do this if you’re not an adult or if you don’t have adults near you, and don’t do it near flammable objects. Please).
Now yes, thousands of characters after announcing it, it was time to get to work, or almost, here’s a guide for you to start having fun with this amazing technique:
This technique requires you to be very clear about what the final product should be because it doesn’t exist yet, since you haven’t drawn it yet. Take your creativity and knowledge to the limit for incredibly bright photos.
To close the article, I will allow myself the audacity to ask you to practice what you have read, make no mistake, if you have read so far, YOU LOVE Lightpainting, you can not wait to produce photos similar to those shown in this article What are you waiting for?Do it!
As always, thank you for your attention. If you liked this article, would I like you to leave a vote or recommendation below on Facebook, Twitter or Google?Thank you in advance!