Before the digital age, panoramic photography was reserved for a few fans with specific cameras to work on in this format. Today, anyone with a digital camera and access to a computer or even anyone with a smartphone is able to take panoramic photos easily and quickly. You may never have thought of trying the panoramic photography, in this case I would recommend you before you start to take a look at these two articles to wing your appetite:
As a photographer, the more tools you have at your disposal, the more adaptable you will be to each situation and the richer your images will be, so if you haven’t already done so, with panoramic photography I recommend that you immerse yourself in not only is it very easy to practice, but it leaves you with images that you can not get in any other way.
- A panoramic photograph is a photograph that covers a larger part of the scene.
- Has a much larger viewing angle than other more common types of formats.
- With panoramas you can convey the vastness of the landscape and introduce elements that you could not otherwise include in the frame.
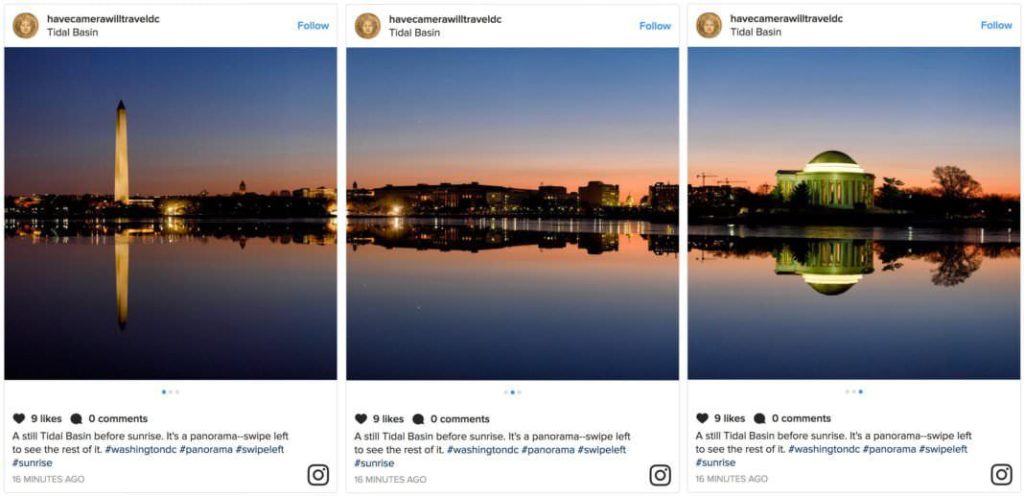
- Here’s an example:.
And what is that he promised you in the title? Allons-y. Most panoramic images are like the one we have seen before and how we usually take most of our photos; Horizontally, but the truth is that if you use the vertical format combined with panoramic photography, it will provide you with surprising and unique images that would otherwise be impossible to obtain.
Here are some ideas (with tips) so you can take a look and see what I mean.
Panoramic photography is nothing more than joining multiple correlative and overlapping images to show a single elongated image. Normally we think of landscapes, but the truth is that the possibilities of verticals are impressive. Architecture is one of the most recurring motifs in panoramic photography. , as it allows a close-up of the buildings without losing any of their parts.
Vertical panoramas for indoors and outdoors allow you proximity and details without losing some of the framing, without giving up the full image, plus you won’t have optical distortions like wide angle or fisheye, which are the ones that provide us with a larger image. angle, but at the same time something or a lot of distortion, especially at the edges of the image.
The best way to get panoramic images of any kind is to do it with a tripod, especially indoors where, in addition to the problem of keeping the frame, one lacks light, although it is not always essential.
When it comes to photographing cities from above, and want to give an impression of height and depth, don’t forget to take some photos and then assemble your panorama, the ideal is to frame horizontally and take the images from top to bottom and in case of doubt to take several. You’re still in time to eliminate them later.
When taking panoramic images remember that they have to overlap in part so that the program you are going to use recognizes the areas where the images are located, there are those who recommend that it be 10% of the image that should be repeated, but I have read up to 20 or 25%. As always, is it a matter of practice?
Although in the most typical landscapes is the horizontal format, do not stop trying the vertical formats, we usually use them to give importance to the sky because it is a protagonist in itself, but at the same time we want to give it a proportion and a context. Or on the contrary, we want to highlight an elongated element (for example, a tree) or whose vertical path you want (for example, a river). Here are some examples:
In the example above, if we didn’t put heaven in context, we wouldn’t have an idea of its immensity. Instead, by adding things like the mountain, we contextualize and provide the amount of sky we refer to in the image.
The vertical format allows us to include the full proportion of skies that we want at the same time that we give importance to the lowest shape of the image.
For vertical and horizontal panoramic images without distortion, consider using optics with a distance between 35 mm and 50 mm.
Otherwise, how could you get the image above if it wasn’t with a panoramic image?
Vertically framed, it allows you to follow a vertical path, such as a waterfall, a river, a path, etc.
Sometimes in life we have no choice but to choose between two or more options that we like. Photography, unfortunately, is no different, have you ever been able to choose between incredible skies and incredible terrestrial landscapes?
Do you think, “I love this street scene, I love it high with these clouds, with this beautiful sky?””But the sad reality is that this framing is only possible in your head because it doesn’t fit into your sensor; – Well, this can be solved with vertical panoramic photography Who says you can’t have everything?
Didn’t you have the mistake of trying panoramic photography in general and vertical panoramic photography in particular?Well, I’ll tell you what; for me if ;-).
The truth is that horizontal has made me addicted for a long time, but in vertical panoramas I find it more difficult to fall or think about the possibility and opportunity to take one, although if you leave a little freedom to your imagination, they don’t even need great buildings or landscapes, and if you don’t look at the next verticals ranging from a man’s path from his house to his work , who doesn’t practice because they don’t want to ?.
And finally, I leave you with this tutorial by Alejandro Mallado where he explains how you can mount a vertical panorama in Ligthroom:
I hope you liked it and encouraged you to practice panoramic photography, if so it would be great if you shared it on your favorite social network (Twitter, Facebook or Google) Thank you very much and the next !?