In this article I offer you a tutorial so that you can build your own light box easily and at very low cost, we will go step by step and illustrate the process with photographs, you will see how simple it is. What is a light box? Here’s a photo to see, but it’s essentially used to brighten your objects in a smooth and diffuse way.
A light box is mainly used for product photography or still lifes, although it also works for all the photographs you want to experience at home in diffused light, of course with small or medium sized objects;).
- If you’ve ever wondered how you can get a picture of an object in detail.
- With backgrounds so white and well lit.
- Here’s the answer.
- You might think that only a professional can do something like that.
- But that’s not the case.
- A light box is enough for you (and the basic knowledge of photography.
- Of course?).
You will need the following material, as you will see, some are not essential and others may vary depending on your tastes, preferences or availability:
As I told you in the introduction, I’ll explain it step by step so you don’t get lost, I’m one of those who need everything to be well chewed, and I like to explain it like that, because I hope I don’t. be the only one;).
On the sides and at the top, mark a frame of about 4 or 5 cm, from the edge inwards, also depends on the size of the case, if it is very small the frame will be narrower.
With the cutter, cut down the line and remove the leftover cardboard, you will have windows like these.
This will not only look prettier (which is a dot;)), but better reflect the light. This step is optional, if you are going to cover the entire interior with fabric or paper, it is not necessary. And outside?at ease, if you want to paint it and beautify it all is yours ;). And another thing, you don’t have to paint the background and the base because the white cardboard goes, if you look in the photo you will see that I did not paint it (I just cleaned the brush on the cardboard; Q).
Or fabric, whatever you choose. You can put it outside if you find it more comfortable, or put it inside covering the entire interior so that no cuts appear in the photos, you can paste it with insulating tape or with regular glue or hot melt. fabric, try to stretch it well. The same goes for a paper with few bodies, such as a tissue. When I hit him, I threw him from both sides to squeeze him as tightly as possible. Then I cut the leftover edges.
This will look more or less like this (you can say that the glue hasn’t dried yet, right?;)):
Measure the width of the box and cut the cardboard to the appropriate size. You can glue it or put it with pins in case you decide to change the bottom from time to time. As you will see (red arrow) I did not put it right on the edge, but my box was very high and the cardboard did not reach the edge of the base, so the cut was visible in the photos. (Self-condition note: choose the box size?). the cardboard falls on its own, do not bend it so that it sticks to the background, so that you do not see the fold in the photos, it is better that it has that curve. I put carte blanche, but you can also put one of another color or even a cloth, it all depends on the background that interests you most for your photograph.
You’ve got your box ready! Mine has been like this, I’m sure it suits you better, it depends on how you make crafts or crafts and the patience or time you spend on it, but in this case the important thing is not that it’s beautiful but that you can make the images you want, whether they’re functional, so don’t be overwhelmed by perfection;).
Here is an example, first without light box, then with light box. This test is performed with natural light, under a window.
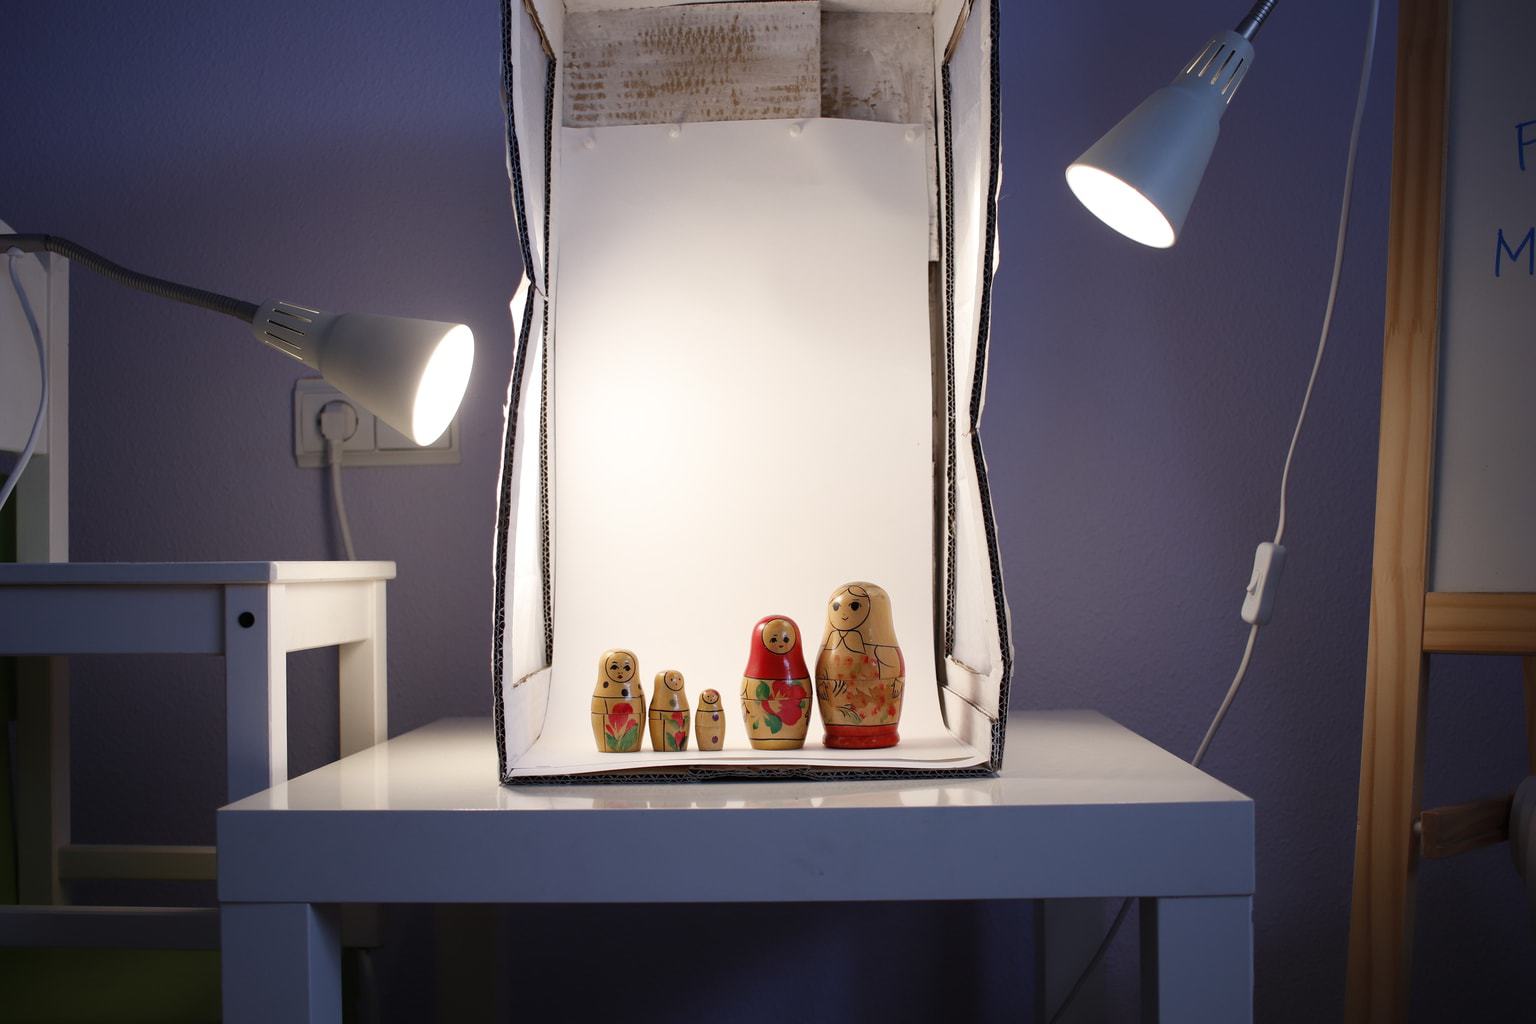
But, of course, the light box isn’t just for when you have great natural light, is it?When the light is quite weak, place spotlights on each side, as in this example.
Why don’t you work too hard, run out of time?Isn’t craftsmanship your thing? Well, it’s okay, either. If you’re interested, you have very affordable light boxes.
For example, this comes with a built-in light by (price not available at this time)
Or this other laptop that includes four different colored backgrounds:
And if you’re looking for a mini size, you have this option
Now that you’ve read the article, do you want to have yours ?, you’ve already seen that it’s very, very easy, and if you decide to buy it, there are also economic options, the photos of your products will look like a movie. and you can practice lighting with any object you have at home with a “mini-studio”.
I encourage you to get one and share your feedback or share the results. And, if you found the article helpful, share it to reach more people. Thank you and see you soon.