Today is about the birds. This type of photography has its complexity, but as always there are tricks and tricks that can make it easier and more affordable for everyone. Only condition: that you like it.
There you have it, 7 quick tips to make bird photography a little easier?
- 1) Look for birds instead: You don’t do a photography session of birds walking camera in hand around the neighborhood.
- Well.
- You can match a disoriented and lost bird.
- But if you do well I recommend going to a park or nature reserve where you will find birds galore.
- If you have a nearby port this can also be a good idea.
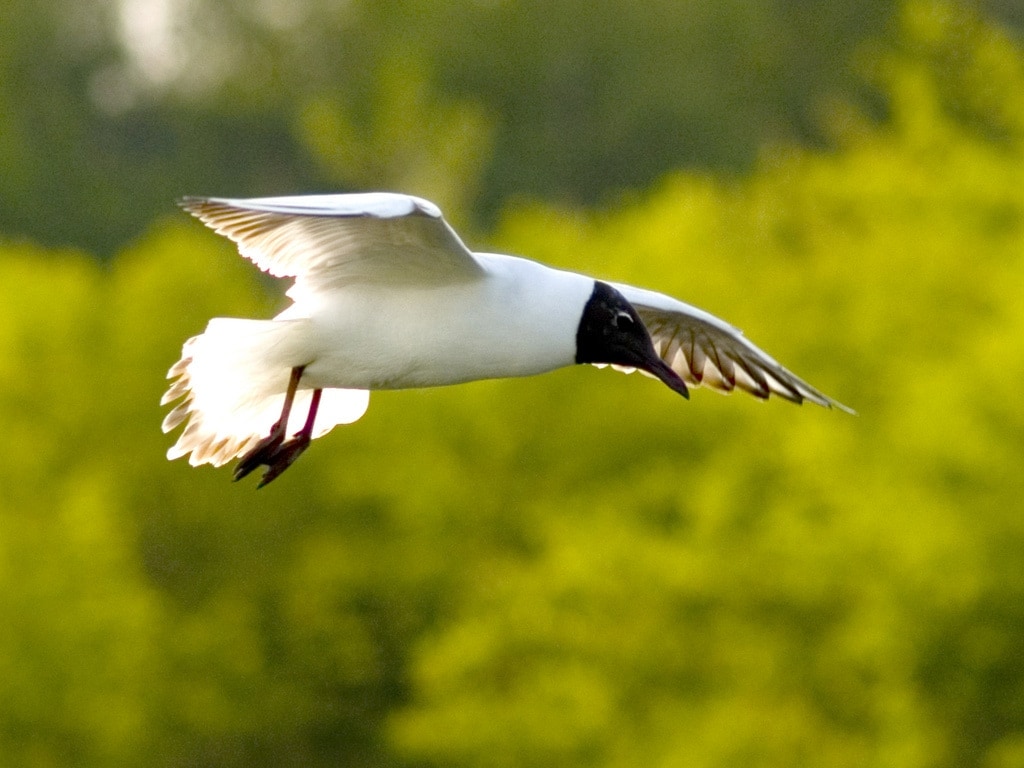
- Port gulls are usually the first birds to pose for the amateur photographer.
- As they do not seem to have much scruples.
2) Learn about time: obvious but sometimes necessary advice?I’m sure you already know that birds appear or disappear depending on the weather, so keep that in mind when planning your excursion.
3) Get a good telephoto lens: Depending on the size of the bird and the minimum distance it can tolerate, you will need a telephoto lens with more or less reach. I wouldn’t shoot under 200mm, although if given a choice I will definitely go for a 300mm. Birds are elusive, they move all the time, so the tripod probably won’t do you much good. You will have no choice but to shoot camera in hand, resulting in possibly shaky photos. To avoid this, make sure the lens has the image stabilization function.
4) Settings: also try to activate any settings that help stabilize the photo: open the iris as much as the lens allows (remember, this is achieved by using an f / value as small as possible) and, if necessary, increase the value ISO a bit, depending on the camera model you have, I think you can go up to ISO 1000 with almost no noise. Because all of this? Birds, as I said, are unpredictable in motion and of course run the risk of blurring the shot, unless we capture the shot at a relatively fast shutter speed. The faster the shutter speed, the sharper the photo will be, but in exchange for that sharpness, the photo tends to appear dark. Hence my recommendation to use a large aperture diaphragm and increase the ISO. Also, if we shoot on a very sunny day, will that help? If you want to copy my method: I usually shoot in aperture priority mode (A on Nikon cameras, Av on Canon and other brands). I choose the maximum aperture that my lens allows (f / . . . very small value) and start shooting. If I see that the first few photos are blurry or dark, I increase the ISO value, upload and test, until I get the correct balance. One last detail: enable burst shooting. Bird photography requires a lot of photos to save a few that are decent.
5) Focus on the bird’s eyes: do it. In photography, all animated living things (humans, animals) are focused on the eyes.
6) Be patient. It doesn’t move. Shuuuut!?: Instead of chasing the birds (they’ll run away as soon as they realize you’re leaving), it’s a good idea to arm yourself with patience, time and stay as still as possible. In a short time these flying subjects will lose their fear, at the same time that you do not pose any threat to them and they will gradually approach you.
7) Camouflage you, really? If you take this type of photography seriously, there are camouflages that are sold specifically to take photographs of animals and birds, are garments, coats and tents similar to those of the military, which allow the photographer to camouflage himself in the natural environment. and thus be able to be within a few meters of the birds you want to photograph. If you want to see what it looks like, check out this Javier Milla page.
You don’t have to be an expert to go out and photograph birds. Is it fun, do you learn a lot and is it a healthy and peaceful way to “hunt” without harming the physical integrity of an animal?